RapidWright IntelliJ Setup
Step-by-Step Instructions
Make sure you have a Java JDK installed (1.8 minimum, 11 or later recommended). Any distribution such as Adoptium should work. Add the
binfolder of your JDK installation to yourPATHenvironment variable.Download IntelliJ: https://www.jetbrains.com/idea/download/
Install IntelliJ by running the setup executable.
Start IntelliJ, and naviagate through setting selection (if necessary) to the welcome screen.
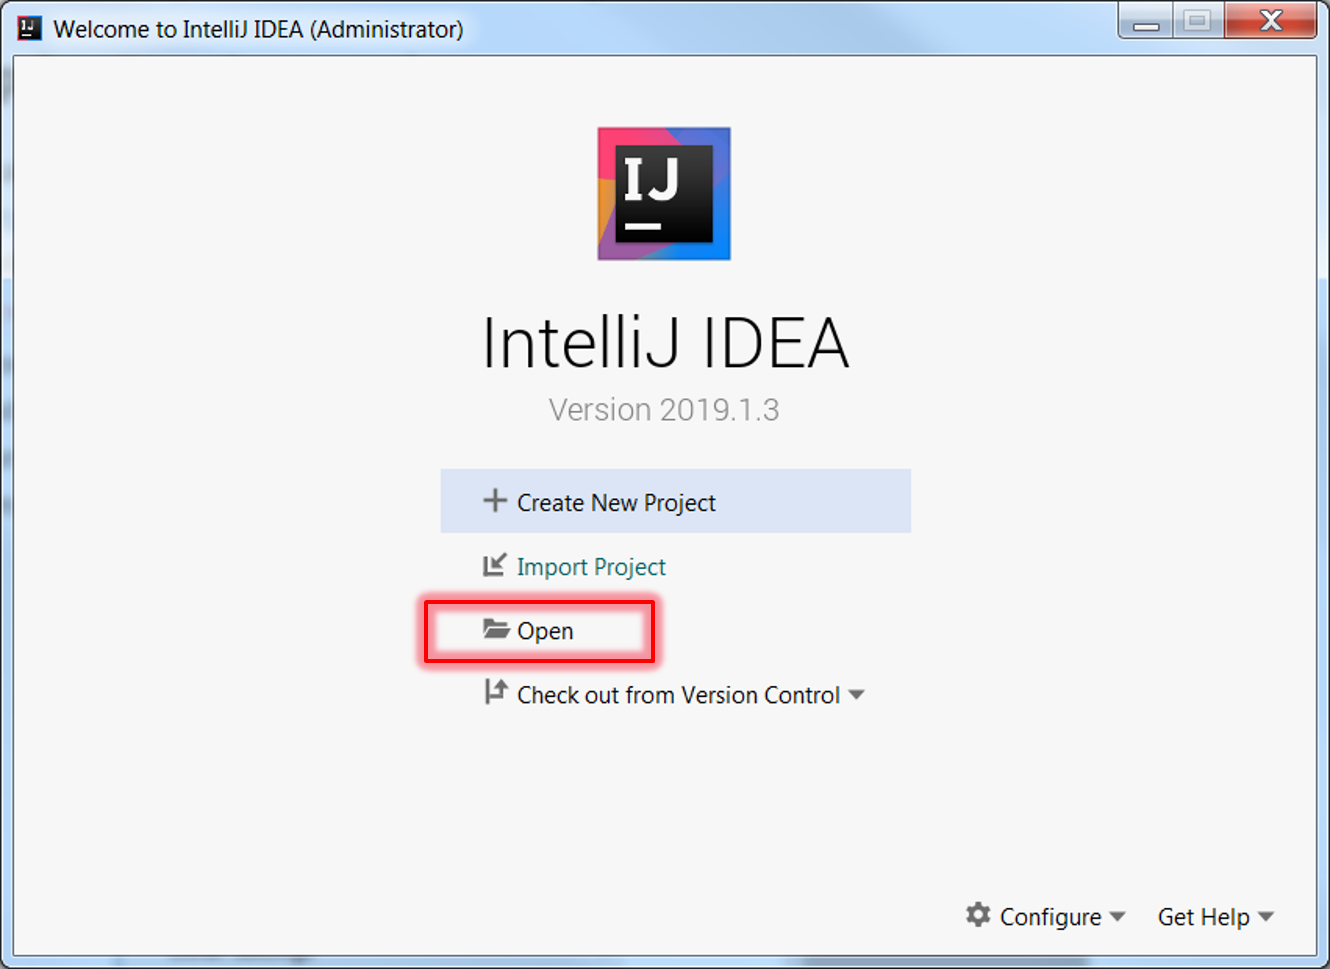
Choose
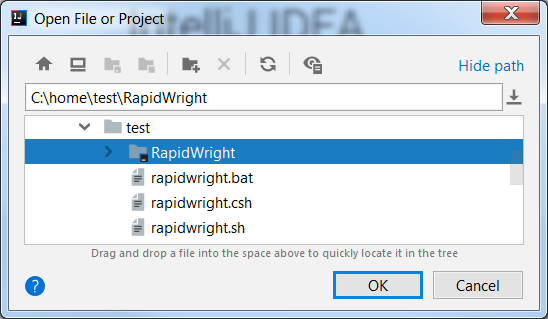
Openfrom the Welcome screen and navigate to theRapidWrightdirectory where RapidWright has been installed, then clickOK.
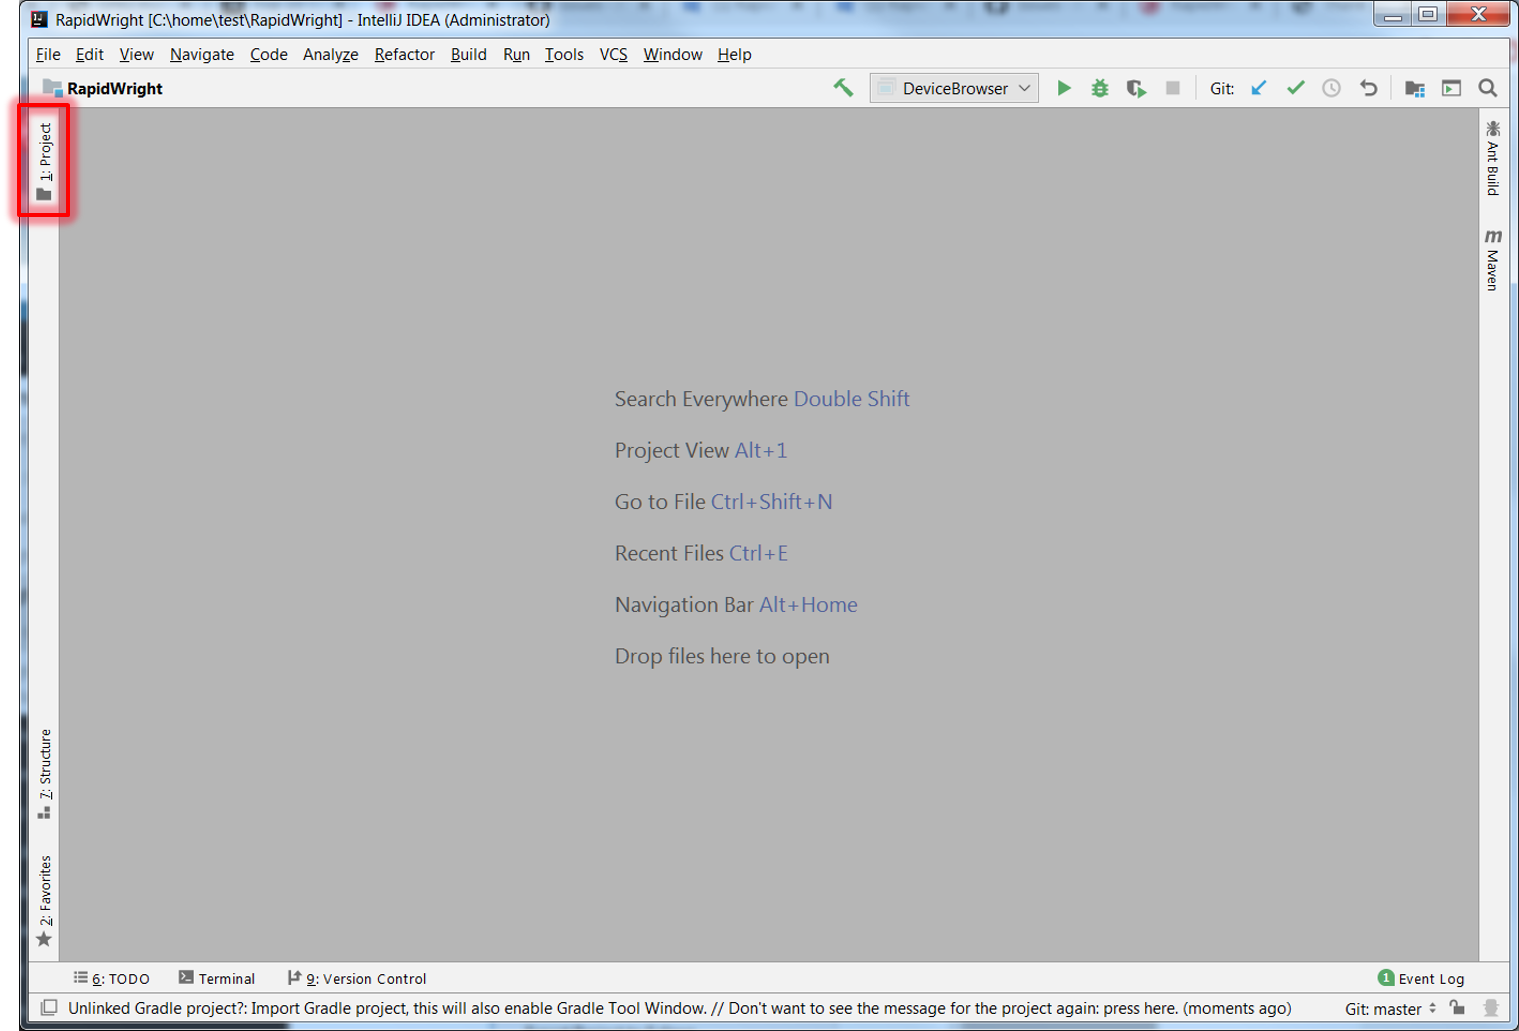
The RapidWright project should open and IntelliJ may indicate that it is indexing the project. Click on the
1:Projectbutton at the top left sidebar, this will expand the project tree:
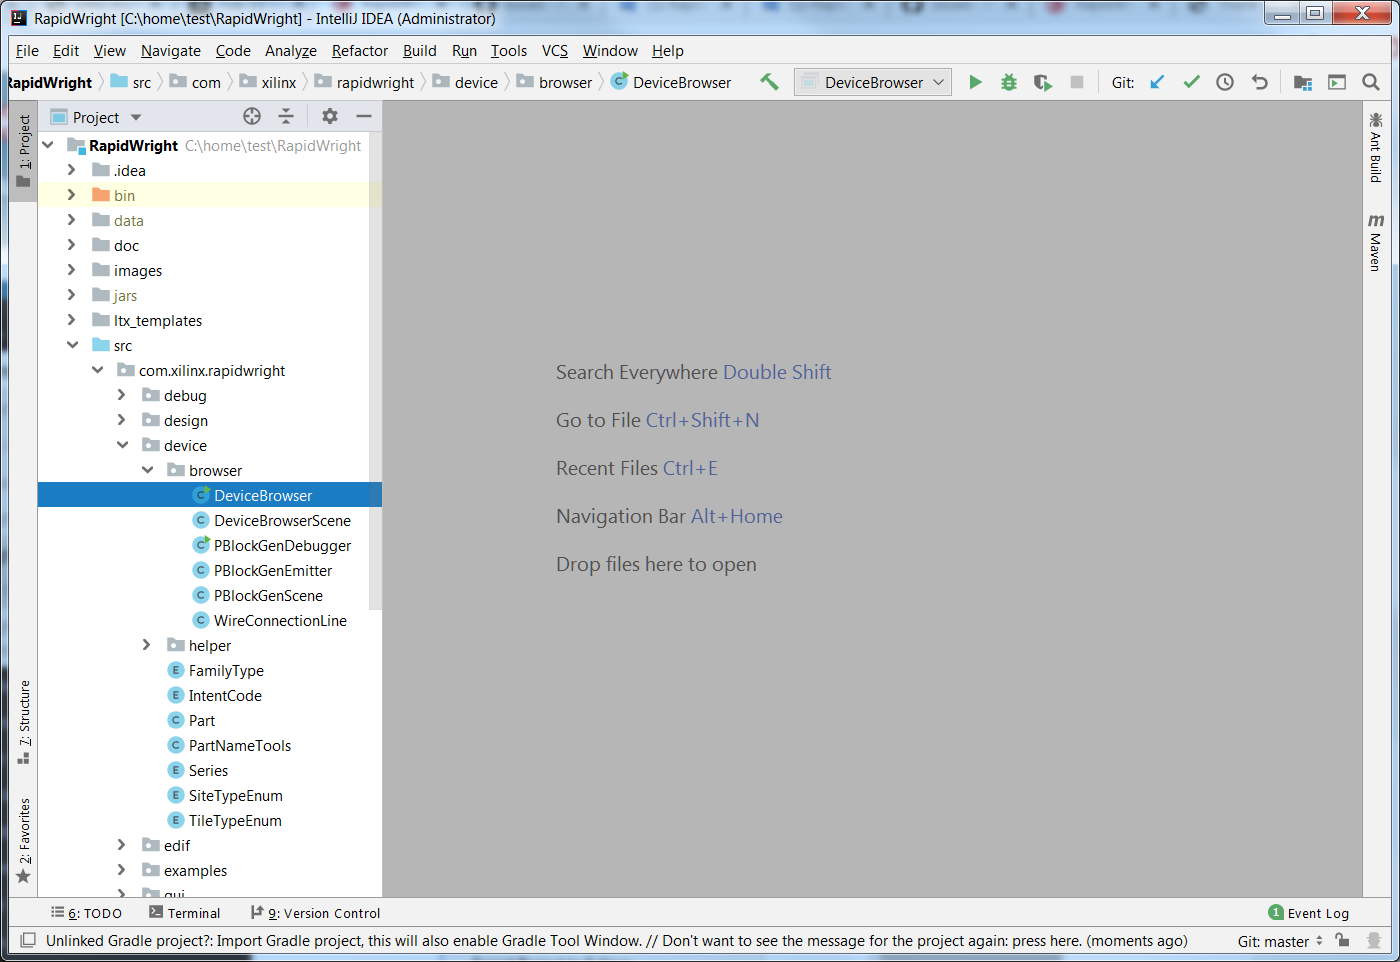
Expand the source tree to navigate to the DeviceBrowser class,
RapidWright/src/com.xilinx.rapidwright/device/browser/DeviceBrowseras shown in the screenshot above.IntelliJ will detect RapidWright’s Gradle build and import it automatically. Gradle downloads all jar dependencies and selects the correct platform-specific GUI library for your OS (Linux or Windows), so no manual library configuration is needed. If IntelliJ does not import the project automatically, right-click on
build.gradlein the project tree and chooseLink Gradle Project.You should now be able to run any of the programs in RapidWright in the IntelliJ environment. For example, right-click on
DeviceBrowserand chooseRun DeviceBrowser.main()from the menu. If successful, the DeviceBrowser will run similar to the screenshot below:
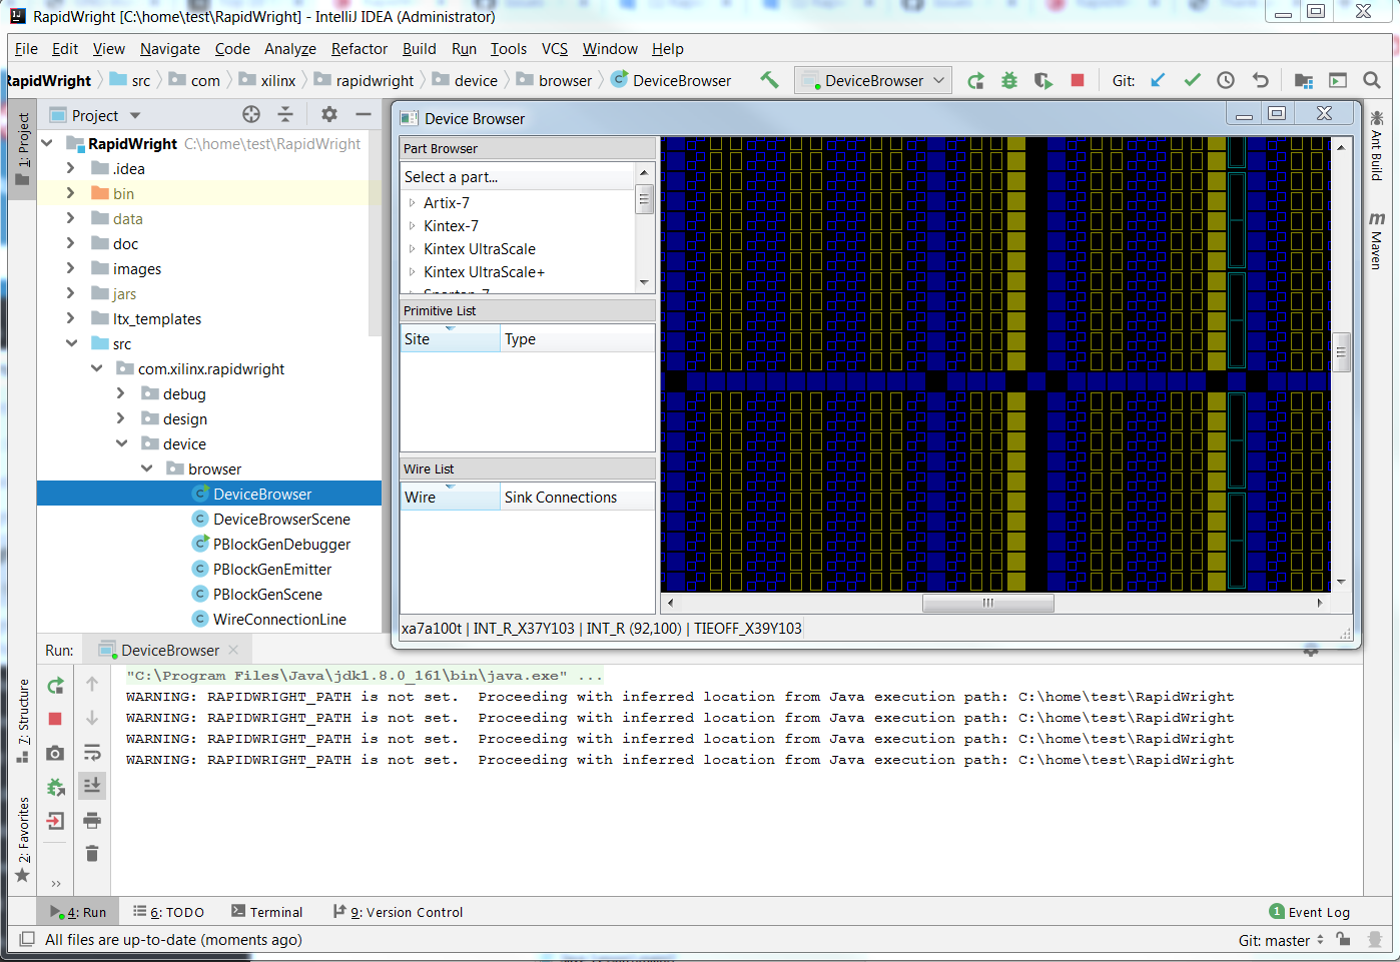
The IntelliJ environment should be correctly configured at this point. If you have problems, try setting the
RAPIDWRIGHT_PATHenvironment variable to point to your RapidWright install directory prior to running IntelliJ.